Professional Practice and Exhibition; PDP

Professional practice is a module that helps prepare the students for their professions in the future. We were given tasks in preparation for the future such as writing creative CV’s, applying for opportunities and writing a SWOT analysis (strengths, weaknesses, opportunities and threats), and also what we need to have an online presence. Over the course of two months we had lectures with maker tutor Ingrid Murphy to emphasise the importance of planning and preparing for the future at the present moment so that we have a step towards our careers. These lectures included going through information such as how to successfully set up a website, how to take professional quality photos of our art works, where to find funding sites as well as opportunities whether it be from volunteer work to international projects.

The first task we were given was to write a creative Cv specifically aimed to apply for anything involving art opportunities. The CV’s asked of us were just like a traditional one just with the addition of a brief artist statement, our skills specifically in arts as well as an eye-catching format so that it becomes more noticeable when applying to artists and galleries. Writing this CV was quite enjoyable as I already had a traditional one to add to. During my studies in uni I have been able to get involved with little projects that I was able to put down on this creative CV. Our second task was to have an online presence, whether that be an accessible digital portfolio or a personalised website displaying or work. Again I had already been working on my blog during the coarse of my studies as well as a professional instagram account displaying my final pieces created within uni. What I found to be more challenging was having to gain the confidence in order for me to apply for opportunities within the art community as well as applying for grants to help fund said opportunities.

Once we had gathered all of this information, completed our tasks and applied for new experiences, we had to keep evidence of all of this work within a professional practice powerpoint presentation. This presentation had to be 10-15 slides including all of the work above as well as the final exhibition set up. this will be presented a minute per slide in the near future.

The final part of this module was the actual setting up of our final exhibition show. THis was a full job within itself as there were many things the students and staff had to consider whilst the show was being put up. Things such as each individual students placement, how their work corresponded with the work of the students around their area, plinth creation and many other little things. I was fortunate enough to be sharing a plinth with another student so we were able to help each other with that. The set up specifically for my work went quite smoothly as it was only a matter of figuring out how I wanted to curate the positioning of my pieces and I had already roughly figured out through the creation of them as they had specific places to sit and were made in thought of each other. There were a few things I would do differently in the future such as getting more involved with the assigned buddies so not to pile up too many small jobs for myself and focus more on my work and also better curatorial planning.


Research and Development PDP

We have essentially been preparing for our final exhibition show since the very beginning of this school year. Our first project was the G-bowl exhibition for Llantarnam Grange which every ceramic student was involved in. The project was to create a final bowl/bowls that showed clear indications of our own personal artistic styles. this was given to us in preparation to hone our creative skills and desired making process in a way that we could develop on towards the final exhibition.

I am glad that we had that first project as I was still very unclear on what my creative making style was so this project gave me the chance to really think about what it was I wanted to do for my project. I am especially glad to have had the chance to make all my mistakes and adjustments in that first term. I had tried to over complicate things in both my concept as well as firing process. My original idea was to hand build bodies of work to then go through a primitive firing process with combustibles to create smoke fired pieces with colours that came from natural materials to resemble neutral tones within skin colour. The problem with this method was that it was my first time experimenting with this process and I had not considered the amount of time it would take to develop the desired colours as well as perfected firing method which would usual take a few months/years to get to grips with. As I had tried this method out in the first term I was able move on to a different firing process for my final exhibition pieces.

Though I had changed the method for my firing process I did realise that the actual making process I had decided to work with suited my creative style very well. I hand build my pieces because I found that the results for me looked a lot more sculptural rather than using a potters wheel. I do enjoy coil building as I find that it allows a lot more freedom within the making process. It does take a lot longer than using a potters wheel where you could turn out several pots in a day but I find the relaxing repetitive process quite meditative and also it allows me to really get in touch with my sensitivity towards hand building. It also ties in with my theme of intimacy as it is more like creating pieces that are individuals, spending the time to think about what shape these forms will take on whilst still handling, caressing and getting a real feel for the clay through the process. By taking time to build the individuals, my pieces are able to take on little playful personalities as the forms correspond with one another.

One thing I would like to do differently is to really think about the planning of time and also self discipline. Though I am happy with the results of my final pieces, I do think I could have create pieces of work to a much higher standard if I could just use my time efficiently rather than leaving everything to the last minute.


Setting up the show


The final set up was pretty straight forward in my case. I did have to work on the plinth and help make sure everything else was tidy but other than that after I had found the composition of the work that fits well with my concept of inviting intimacy. I feel like the pieces do convey the message pretty well. The surface of the vessels finally came out of the kiln successfully after a couple of attempts leaving them with a light blush gradually fading to white, the terra sig has left a smooth surface that does seem to invite people in. The rougher texture displayed on the black pieces give it an interesting textile that people get curious about and are intrigued to investigate. The masculine vessels look quite content resting on the curvaceous bases pieces. I do wish I had better planned out my time so that I could have ended with a larger body of work but I am still pleased with the final result.

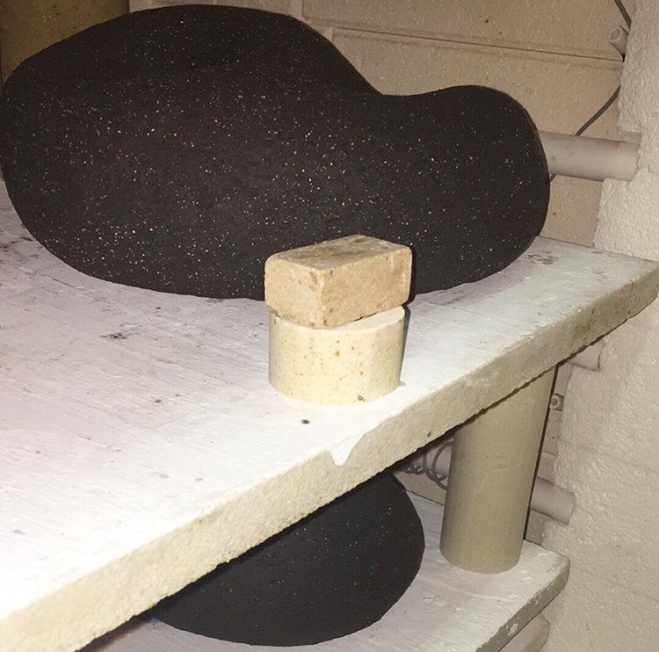
Bases out of the kiln

The grogged black clay is a high fired stoneware clay and I always find that the high temperature firings can get quite risky and are more likely to end with kiln disasters. I was very pleased to see they had survived with no damage. I was taking all the precautions such as making sure that the basis were 100% dry before being loaded into the kiln as well as cutting holes into the bottom of the bases to allow air to escape during the firing. This is the opening of that kiln;

60019516_2175468595877064_8939981298571673600_n

I was really pleased with these results. I really like the how the texture of the grog is prominent against the deep black colouration of the clay body. I didn’t realise though just how much these bases were going to shrink in the kiln so did leave the areas where the white vessels are to sit a little tighter than planned but not too much so wasn’t too disappointed, I will just have to get some adhesive to make sure they sit securely for the show.

LF Vessels

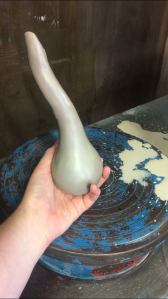
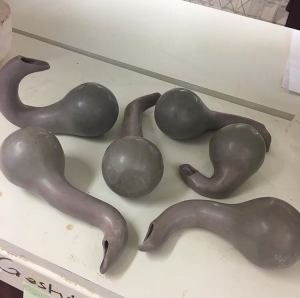
After the results of my first set of pots i decided to make a few changes to the form. Still sticking to the form of the pots being carefree, playful and being masculine (somewhat phallic) in opposition of the feminine bases I did want to down size them as to help with time consumption as well as stability (the length of them against their own rounded basis left them very unbalanced). It was also important for them to be in proportion to the black based forms and this is the results of those new features;

60013148_1694297207340292_3519972827195244544_n


I had already applied terra sigillata by this point but as I was in a rush to get them into the kiln they were still leather hard whilst I sprayed them and that left a few drips and uneven patches on them so Im not quite sure on what the results would be after firing them.

Fired Pots


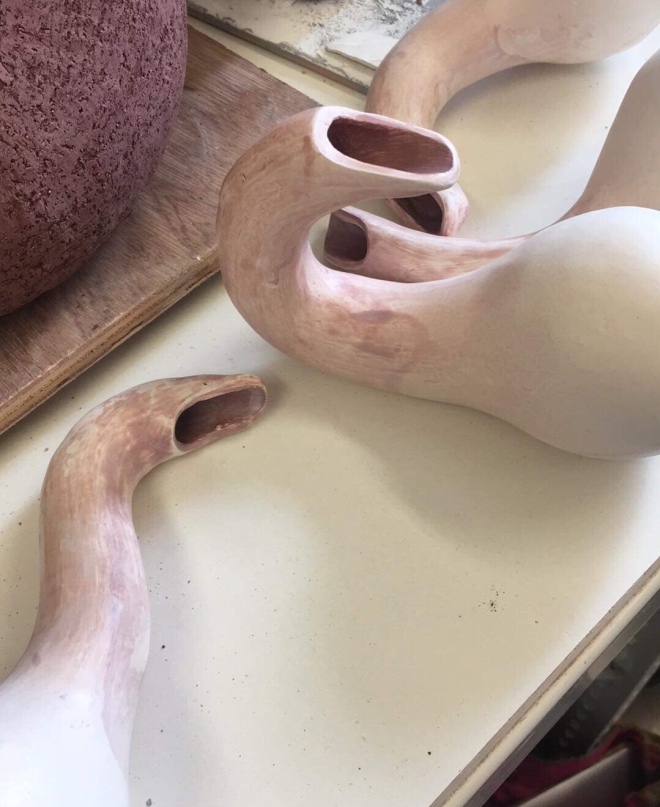
This is the result of my first terra sigillata application. I am quite happy with the colours used but think this can still be improved upon. The colours did come out to show the subtle undertones of pinks that is often seen in flesh but the application and surface quality is not reaching the standard I would like it too. I had chosen to work with grogged white clay as this would be very suitable for a primitive firing method which I was going to previously use but this left little imperfections on the vessels surface and as I was no longer practicing those firings I have decide to use a different clay body, one that has a whiter colouration but a low firing range as terra sigillata can not be fired over cone 4. This is why I am going to change the clay body to LF earthenware.